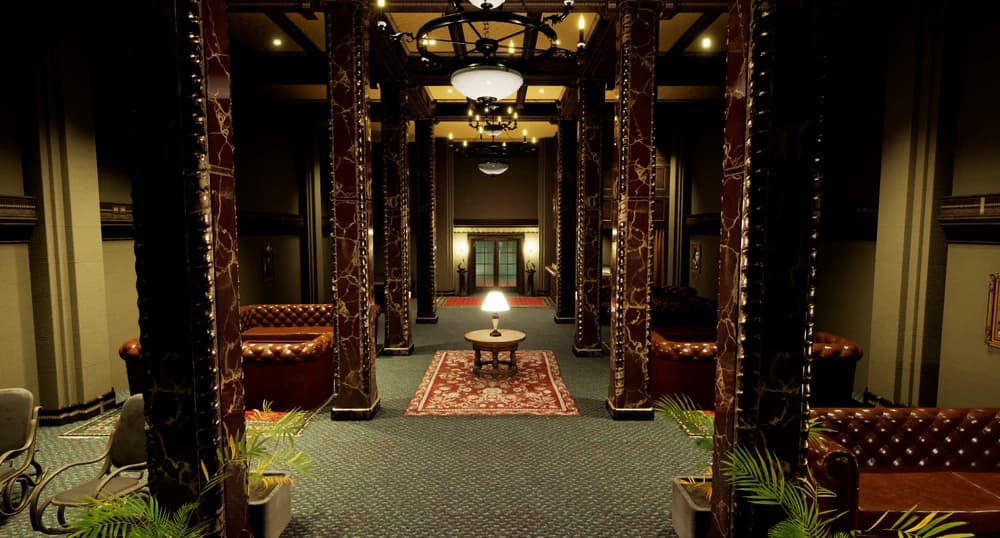
This Escape the Backrooms Level 5 map guide covers the Main Hall, Hotel and Boiler Room sections, including the painting puzzle and Room 235.
The Main Hall
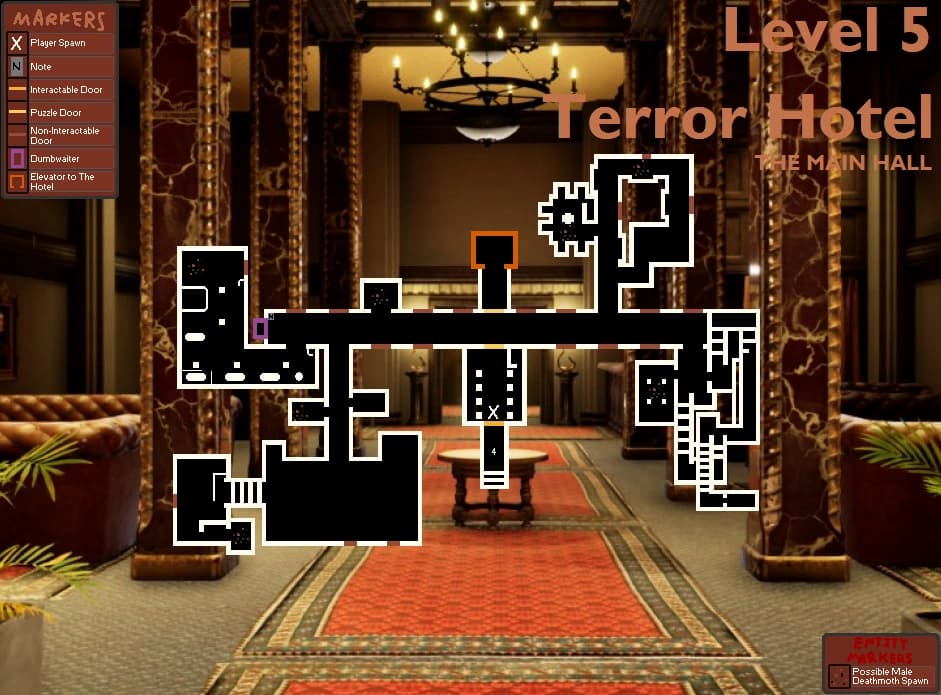 1234
12341: Painting Puzzle
Press the four paintings from the youngest person to the oldest person to open the Main Hall route.
2: Dumbwaiter
Place one Moth Jelly in the dumbwaiter at a time. Three exchanges return the three keys for the locked gate.
3: Elevator to the Hotel
This is the elevator reached after the three locks on the glass-door route are opened.
4: Three-Lock Gate
Use all three keys here to open the route to the elevator.
Recommended order: complete point 1, make three Moth Jelly exchanges at point 2, unlock point 4, then take the elevator at point 3. Bug Spray is available at the lobby desk and is used on Male Deathmoth swarms.
The Hotel
 1234
12341: Mailbox Area
Use the open mailbox compartments to identify the rooms that must be searched for papers.
2: Room 235
Enter the five-digit ceiling code here after returning the required papers to the mailbox.
3: Hotel Room Loop
Use the numbered rooms and door markers to orient the paper-search loop; the open rooms vary by run.
4: Route to the Boiler Room
Room 235 opens this progression route after the code is entered.
Collect a paper from each room named by an open mailbox compartment and return it to the mailbox. The completed message reveals the ceiling code. The map helps with room orientation, but it does not promise a fixed paper location because the open compartments change.
The Boiler Room
 1234
12341: First Checkpoint Route
The map marks the first checkpoint-spawn area in the upper middle section.
2: Second Checkpoint Route
The second checkpoint marker is in the upper-right route.
3: Bug Spray Pipe Area
Use the marked Bug Spray pipes to deter Female Deathmoths if they are blocking progress.
4: Exit Route
The final marker is placed by the lower exit route. Confirm the door has an exit sign; the guide warns that other doors can be false exits.
Follow the checkpoints as recovery landmarks rather than assuming a safe route. Watch the thermometer: the guide states that a reading other than 72 degrees signals nearby danger. Purple doors lead to hives, so identify the exit sign before committing to a door.
How to Use This Level 5 Map
Level 5 is easier to understand when it is treated as three linked objectives rather than one long maze. The Main Hall is a compact setup area: solve the painting order, convert Moth Jelly into keys, and use the key gate. The Hotel is a variable room-search puzzle: the open mailbox compartments tell you which rooms matter on that run. The Boiler Room is a navigation and survival section where the thermometer, checkpoints, pipes, and exit sign matter more than speed. For the full objective order and survival strategy, follow Escape the Backrooms: Level 5 Terror Hotel.
Keep the map open while deciding where the group will regroup. In the Main Hall, regroup before the dumbwaiter so nobody spends Moth Jelly by accident. In the Hotel, one player can read the mailbox while others move to the named rooms. In the Boiler Room, call out the nearest checkpoint and Bug Spray pipe before entering a long corridor. These habits turn the maps into a team communication tool instead of a picture that is only checked after someone is lost.
Main Hall Walkthrough and Numbered Points
Start with point 1, the painting puzzle. The instruction is about the people shown in the paintings, not about the locations of the buttons: activate them from the youngest person to the oldest. Once the route opens, collect Bug Spray from the lobby desk and look for clusters of Male Deathmoths. Bug Spray changes a cluster into Moth Jelly. Do not assume one jelly is enough, because the elevator route requires three keys.
At point 2, place one Moth Jelly in the dumbwaiter and send it down. When it returns, take the key and repeat the same exchange until the party has three keys. The safe habit is to count keys out loud before leaving this side of the hall. Moth Jelly can also be consumed, so using it as a consumable before the key objective is complete can force another search for a swarm.
Point 4 is the three-lock gate. Use the three keys there, then continue through the newly opened route to point 3, the elevator to the Hotel. The numbers are deliberately not a speedrun route: they are a checklist. If the gate will not open, first verify that all three keys were collected rather than repeatedly trying the elevator door.
Hotel Walkthrough: Mailbox, Rooms, and Room 235
The Hotel begins at point 1, the mailbox area. Some mailbox compartments are open, and their room numbers determine the rooms that need papers on that playthrough. Read the open compartments before splitting up. A player who starts checking every visible room can waste time and create more noise around the Hound or Skin-Stealer.
Point 3 is the room-search loop. The map gives room numbers and door types so players can call a route clearly, but it does not claim that the same paper is always in the same room. Collect a paper from each required room and return it to the mailbox. The completed message points to the code above; look upward rather than searching the floor for a new keypad clue.
Point 2 is Room 235. Enter the five-digit ceiling code only after the mailbox objective is complete. This opens point 4, the route to the Boiler Room. The key beginner mistake here is to treat Room 235 as an optional side room. It is the progression door, while the rest of the Hotel map is primarily about finding the required paper rooms safely.
Boiler Room Survival and Exit
The Boiler Room does not reward blindly following the shortest visible corridor. Point 1 and point 2 are checkpoint routes, so they are useful recovery landmarks after a failed attempt. If a teammate dies, use the map to agree on the next checkpoint instead of scattering back through the whole area. This keeps the group from repeatedly entering the same dangerous dead end.
Point 3 highlights a Bug Spray pipe area. Female Deathmoths are the major hazard in this section, and the pipes are a practical response when one blocks progress. The thermometer is equally important: according to the guide, a reading other than 72 degrees means danger is nearby. Do not treat a quiet hallway as safe if the temperature reading says otherwise.
Point 4 is the lower exit route. The correct door has an exit sign. The map also shows hives and other doors, which is why “a door at the end of a corridor” is not enough evidence that you have finished the level. Purple doors lead to hives, so pause long enough to identify the sign before opening a door during a chase.
Common Deaths and New Player Mistakes
- Using Moth Jelly too early: keep three for the dumbwaiter before treating it as a stamina item.
- Ignoring the mailbox order: check the open compartments first; room availability and papers are not a fixed single route.
- Entering Room 235 without the ceiling code: it is a progression door, not a random room to brute-force.
- Rushing every Boiler Room door: confirm the exit sign and avoid purple hive doors.
- Forgetting recovery landmarks: call out checkpoints and Bug Spray pipes before moving into unfamiliar corridors.
Level 5 FAQ
Where is the elevator in Level 5?
The first elevator is shown at Main Hall point 3. Reach it by solving the paintings, exchanging three Moth Jelly for keys at the dumbwaiter, and using the keys on the three-lock gate at point 4.
How do you get the dumbwaiter keys?
Use Bug Spray on Male Deathmoth clusters to obtain Moth Jelly. Place one Moth Jelly in the dumbwaiter at a time; three exchanges give the three keys needed for the gate.
What opens Room 235?
Return the papers from the rooms listed by open mailbox compartments. The completed message reveals a code on the ceiling, which is entered at Room 235.
How do you recognize the Boiler Room exit?
Follow the lower exit route, but verify the door has an exit sign. The guide specifically warns that not every door is an exit and that purple doors lead to hives.