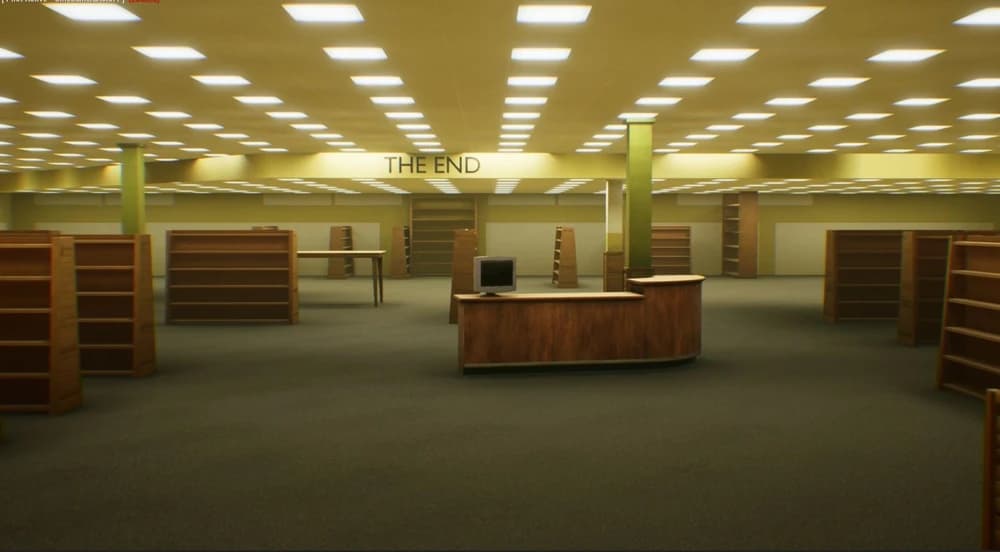
This Escape the Backrooms The End map guide shows the layout, tape spawns, computer, fire alarms, and the route to Level 94.
The End Layout
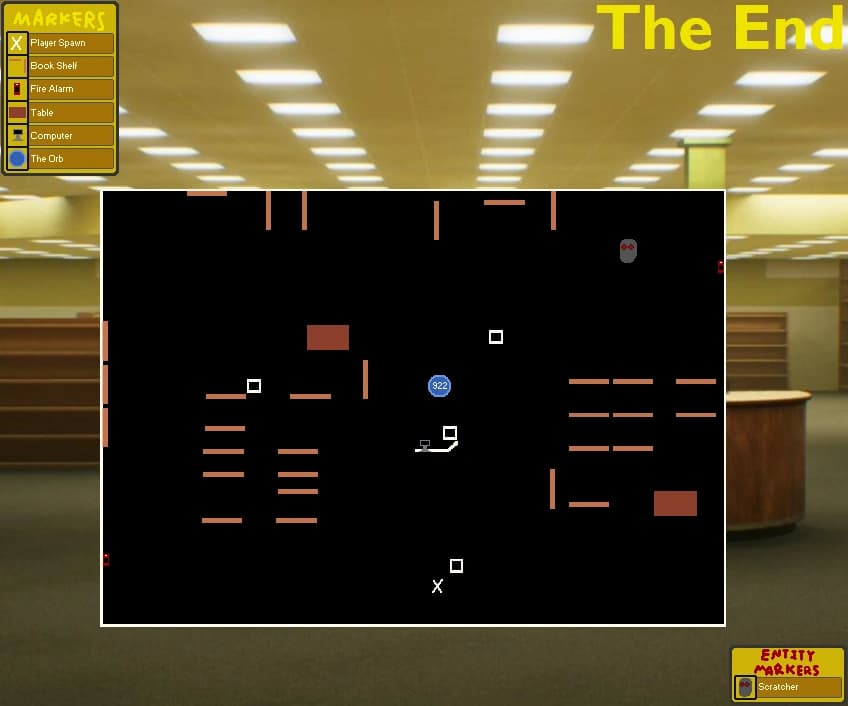 1234
12341: Player Start
Begin here and sweep nearby shelves quietly for tapes.
2: Central Computer
Return here after the required tape count is collected to unlock the damaged-room door.
3: Left Fire Alarm
Triggering an alarm can draw the Scratcher away; it has a cooldown, so use it deliberately.
4: Right Fire Alarm
The second alarm is on the opposite side, enabling a team to redirect the Scratcher before searching the other side.
The numbered route identifies the start, computer, and both confirmed fire-alarm positions. The map also shows tables, which can be used for hiding. The blue Orb icon belongs to an older map version; current progression is computer, unlocked door, ladder, then vent to Level 94.
Average Tape Spawn Reference
 1234
12341: Starting Area
Use this point to decide which shelf block the team searches first.
2: Computer Return
This is the central objective return point after the tape requirement is met.
3: Left Alarm Side
Use this side as one half of a split search after the Scratcher is distracted.
4: Right Alarm Side
Search this opposite side while the distraction gives the team space.
The colored dots show six-game observations, not fixed tape spawns. Use the numbers to split the room into a practical search order, then use the colored observations only as a secondary priority when checking shelves.
How to Read The End Map
The End is a single library room, but its objective creates two different jobs: searching shelves for tapes and surviving the Scratcher while the search is happening. The layout map gives fixed landmarks—the player start, central computer, two fire alarms, tables, and shelf blocks. The average tape-spawn map is not a promise of a tape at every dot; it is a six-game observation that helps decide which shelf groups deserve attention first. For the full objective order and survival strategy, follow Escape the Backrooms: The End (Updated).
Use the two maps together. The layout tells you where you are and where safety tools sit. The tape reference helps choose an efficient sweep order. Do not treat colored observation dots as a route that must be followed in sequence. If the Scratcher is close, the safest available shelf group is more important than a theoretical high-priority spawn location.
Numbered Layout Walkthrough
Point 1 is the player start. Before the team spreads out, agree on a simple split: one player checks one side of the room, another checks the opposite shelves, and someone keeps the central landmarks in mind. Movement, tape pickup, and other noise can attract the Scratcher, so a quiet, deliberate sweep is safer than several players repeatedly crossing the entire room.
Point 2 is the central computer. It is not just a visual landmark; it is the objective return point. The required tape total depends on player count. The current route uses 24 tapes for one player, 32 for two players, and 48 for three or four players. After the requirement is met, return to the computer to unlock the door to the damaged room. Do not assume that collecting the last tape alone ends the level.
Point 3 and point 4 are the left and right fire alarms. They are on opposite sides of the room, which makes them useful for coordinated searches. Triggering one can draw the Scratcher toward that side, creating time to check shelves on the other side. The alarms cannot be used continuously: they have a cooldown, so use an alarm when the team has a clear next search area rather than activating it without a plan.
Tables, Shelves, and the Scratcher
The layout map also shows two tables. If the Scratcher starts chasing a player, the documented defensive option is to run to a table and hide underneath it until the entity gives up. This is different from using a fire alarm. An alarm is proactive—it redirects the entity before a search. A table is reactive—it gives a player an immediate hiding option after being noticed. Knowing which tool you need prevents the common mistake of running across the room toward an alarm after the chase has already started.
The Scratcher is a sound-sensitive threat, so the map supports quieter path planning. Avoid having the whole group bunch up at a single shelf block unless a player needs help. When an alarm has moved the Scratcher, take that opportunity to clear a complete nearby shelf cluster instead of grabbing one tape and running back through the center. A clean sweep reduces repeated crossings and makes it easier to remember which side still needs searching.
Tape Spawn Reference and Search Order
The second image records average tape observations across six games. Its colored dots are useful as a priority signal, not a guarantee. Start from point 1, choose a shelf block, and clear it from one end to the other. Then move to point 3 or point 4 depending on which side is safer and whether an alarm can create a distraction. Return to point 2 only once the required total is reached.
For solo play, a practical order is to clear shelves near the starting side, move through the central shelves when the Scratcher is elsewhere, then finish the opposite side. For multiplayer, assign sides rather than assigning individual colored dots. Tell teammates when an area is clear and when an alarm has been used. This is more reliable than calling out every possible tape position, because actual spawns vary between games.
After 90 seconds, the lights turn off. Plan around that timer: find or preserve a flashlight before the room becomes harder to read, and avoid saving every distant shelf for after the blackout. The maps remain useful in the dark because the computer, tables, and alarm sides give the team stable orientation landmarks even when the room is visually confusing.
Route to Level 94
Once the tapes are complete, go back to point 2 and interact with the computer. The current objective route is: computer, unlocked door, damaged room, ladder, then vent to Level 94. The supplied layout map includes an Orb marker from an older map version, so do not let that old icon override the current door-and-ladder progression. The map page explicitly keeps the distinction so readers can use the historical image without following obsolete exit instructions.
The endgame mistake is relaxing as soon as the tape counter is finished. The computer still needs to be used, and the group still needs to reach the ladder route. Make the return call clearly: stop searching shelves, meet at the computer, then move together through the unlocked door. A team that continues collecting unnecessary tapes after the objective is met is only creating more time and noise for the Scratcher.
Common Deaths and New Player Mistakes
- Treating colored dots as guaranteed spawns: they are six-game observations, not fixed tape locations.
- Skipping the computer: collecting tapes does not unlock the exit until the computer is used.
- Using both alarms without a search plan: wait until the team can use the distraction on the opposite shelf side.
- Running to an alarm while already chased: a table is the documented emergency hiding tool.
- Ignoring the lights-out timer: plan flashlight use before the 90-second blackout.
- Following the old Orb marker: use the current door, ladder, and vent route to Level 94.
The End Map FAQ
How many tapes are needed in The End?
The current guide lists 24 tapes for one player, 32 for two players, and 48 for three or four players. Check the computer and coordinate with the team before making the final return.
What do the fire alarms do in The End?
They distract the Scratcher by drawing it toward the alarm. Because there is a cooldown, use one when the team is ready to search the opposite side of the room.
Where is the exit in The End?
After collecting the required tapes, interact with the central computer. The unlocked door leads to a damaged room with a ladder; the vent at the top leads to Level 94.
Can you hide from the Scratcher?
Yes. The guide identifies two tables where players can hide underneath after the Scratcher begins chasing them.
Why does the map show an Orb?
The supplied image includes an older Orb marker. The written objective on this page follows the current computer-to-door-to-ladder exit route instead.