
Smiler appearance and current behavior
Appearance: The current model is a floating smiling face with sharp teeth inside a cloud of dark fog. The older spider-like body was replaced for version 1.0.
Behaviour: Level 1 blackouts spawn Smilers in the dark, while Level 2, Level !, and the Pipe Run use chase sequences. Roaming Smilers can be held back by aiming a flashlight or camera light at the face from a safe distance.
Threat scale: 3/5 — the score groups directory entries; the written threat label above remains the player-facing assessment.
Observed in: 6 documented routes.
Where Smilers appear in the route
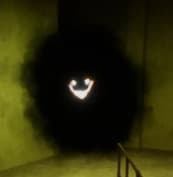
This is the current Smiler model
The small face can look less dramatic than the old spider model in a still image, but it is the correct current design. In play, the fog hides the boundary of the entity, so judge the encounter by the face, the light response, and the route trigger.
That distinction matters because older screenshots send players looking for a body that no longer exists. If the grin is hovering and the room is not forcing a sprint, point the light at the face and back away.
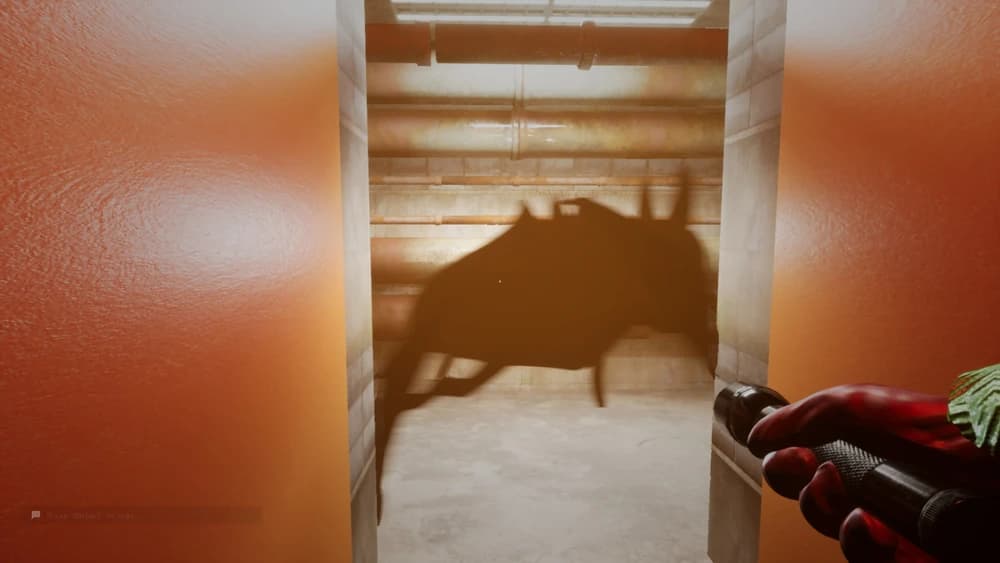
Pipe Dreams turns the Smiler into a steering test
The chase starts after the dark steam route. Stamina is not the limiting resource here; the game supplies it. Most failed attempts come from looking back, clipping a wall, or noticing the final left opening too late.
Center the next obstacle rather than the entity. Once the left gated opening appears at the last split, commit to it and let the closing gate finish the encounter.
Our Level 2 Pipe Dreams walkthrough marks the steam section, infinite-stamina chase, and final left gate in the order they happen.
What to do when the grin appears
Identify the encounter type immediately: reach light during a blackout, keep the face illuminated during a roaming encounter, or commit forward during a scripted chase.
Recognition signal
A floating grin in fog is the roaming model; a screech after a fixed corridor usually marks a chase trigger; a full garage blackout means the lit side halls have become the destination.
Best immediate response
Do not walk closer for a better look. Put light on the face if it is roaming, or turn the camera back to the route and sprint if the level has started a chase.
Reset the encounter
A roaming Smiler is reset by distance and steady light. A chase only ends at its route gate. In Level 1, the reset is reaching a lit side hall.
Smiler tips for co-op
Use one lead caller during chases so players do not collide in narrow pipes. In roaming encounters, one player holds the light while another completes the photo or opens the retreat.
What ends runs: Using one rule everywhere. Looking for a lit hall during the Pipe Dreams chase is as bad as trying to outrun a roaming Smiler when the flashlight can hold it back.
Smiler encounter points
These are route-level encounter notes, not a promise that an entity will always stand in one fixed spot.
Level 1 parking area
The safe route immediately changes from searching to reaching one of the lit side halls.
Final Pipe Dreams corridor
The encounter becomes a forced sprint with infinite stamina; steering and the final left opening decide the run.
Level 55.1 corridor
Light holds the roaming face back long enough to frame the required photograph.
How to survive each Smiler type
During a chase, keep moving and watch the route ahead. During roaming encounters, aim the flashlight or camera light at the face and preserve distance. During the Level 1 blackout, move directly into a lit side hall.
Smiler route notes for solo and co-op
Use these as a short reset checklist. They describe what we change before, during, and after the encounter—not a script to follow blindly.
Level 1 blackout
Solo: As soon as the garage goes dark, abandon the search and take the shortest line to a lit side hall. The Smilers are faster, so waiting for a clear visual is wasted time.
Co-op: Call the lit hall before moving. Do not split across both sides of the garage or stop in the lane to check whether everyone is behind you.
Level 2 and the Pipe Run
Solo: Use the infinite stamina, keep the camera forward, and line up the final left gate before you reach the split. In the Pipe Run, let each steam burst finish before crossing its lane.
Co-op: Follow one route line. Passing another player in a narrow pipe usually creates the collision that the Smiler itself did not.
Level 55.1 photograph
Solo: Use the camera light on the face, frame from range, and leave as soon as the objective confirms. Do not trade a safe lead for a centered screenshot.
Co-op: The photographer controls the face; the second player watches the locker or lift route and calls when it is clear.
How light and scripted chases work
First decide which version you are facing. A scripted chase demands uninterrupted forward movement; a roaming Smiler is managed with steady light on its face; a blackout demands reaching a lit corridor before it closes the gap.
Light works on roaming Smilers
Aim the flashlight or camera light directly at the face and keep your distance. The goal is to stop its advance long enough to leave or take the required photograph.
The scripted chase ignores the photo plan
Level 2, Level !, and the Pipe Run are route tests. Do not turn around to hold the face in light; watch the obstacles and keep running.
The old model is outdated
The current version presents the Smiler as a face in shadowy fog. If a guide shows the large spider-bodied version, its image and some of its advice predate the version 1.0 model change.
Smiler locations in Escape the Backrooms
Escape the Backrooms: Level 1
When the garage lights fail, Smilers spawn in the dark and move faster than the player.
Best response: Stop searching and get into a lit side hall immediately; do not remain in the parking lanes waiting to see the full model.
Open level guide →Encounter 02Escape the Backrooms: Level 2
A scripted Smiler chase begins after the dark steam route. The game provides infinite stamina for the sprint.
Best response: Hold sprint, do not look back, keep the next hazard centered, and take the left gated opening at the final split.
Open level guide →Encounter 03Escape the Backrooms: The Pipe Run
A second short chase combines the Smiler with steam bursts and narrow geometry.
Best response: Follow the marked line, time the steam gaps, and avoid jumping or overtaking unless the lane is clear.
Open level guide →Encounter 04Escape the Backrooms: Level !
The Level ! chase includes a Giant Smiler behind the Partygoer pack.
Best response: Treat the entire hospital route as one committed sprint. Keep the obstacle lane in view and do not turn around to inspect the pack.
Open level guide →Encounter 05Escape the Backrooms: Level 0.2 'Ancient Path' Speed-Run & Exploit Guide
A roaming Smiler can appear on the Level 0.2 route inside Level 0.1.
Best response: Use the flashlight on its face from range and keep a retreat line open instead of walking into the fog to confirm it.
Open level guide →Encounter 06Escape the Backrooms Level 55.1 Guide: Normal Ending & "Wrong Door" Secret Ending!
A roaming Smiler is one of the required photography targets.
Best response: Keep the camera light on its face, take the photograph from range, confirm the objective, and leave the lane.
Open level guide →Before entering the next dark section
- Did we identify whether this was roaming, blackout, or scripted chase behavior?
- Was the light or sprint ready before we closed distance?
- Does the next dark room have a lit exit, gate, locker, or turn already chosen?
Smiler questions
Quick answers for the point where a broad rule needs a concrete next action.
Can the flashlight stop a Smiler?+
It can fend off the roaming face when aimed from range. It does not replace running during a scripted chase.
Why did I die in the Level 1 garage?+
The lights going out is the action cue. Smilers spawn in the dark and outrun the player, so the safe move is the nearest illuminated side hall.
Should I look back during the chase?+
No. The useful information is in front of you: steam, corners, furniture, and the final exit opening.